***Update***
There are Two Kinds of Glass Polishing - Topical and Sub-Surface
1
: Topical Glass Polishing
Topical glass polishing is where you hand, or machine polish the glass to remove contamination that has bonded to the glass and will not wash or wipe off. For topical glass polishing, generally speaking, you can use any quality conventional car polishing compound or polish. If it's safe for the clearcoat on a modern car, it's safe to use for topical glass polishing.
2: Sub-Surface Glass Polishing
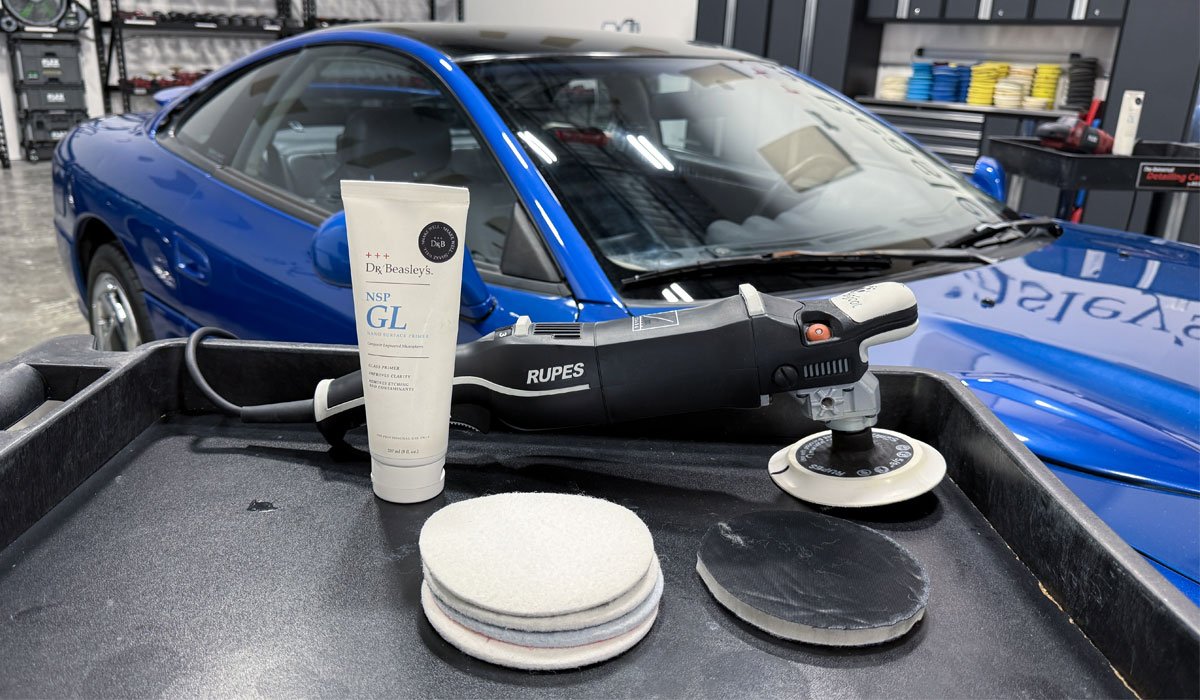
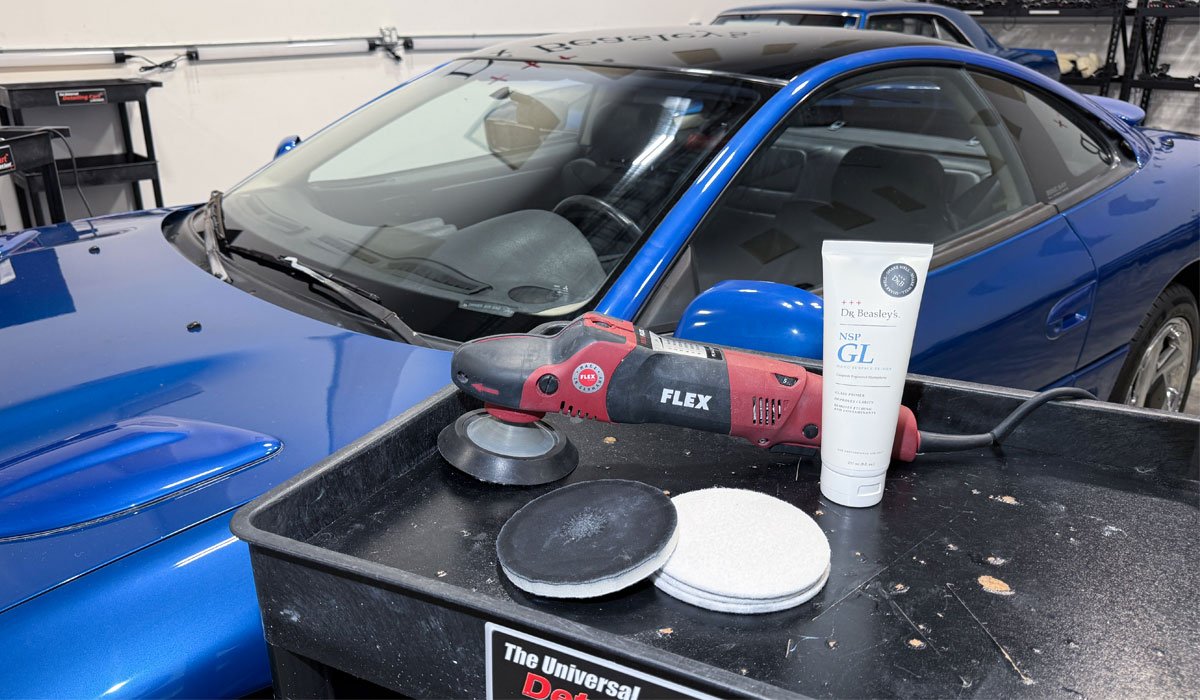
Sub-surface glass polishing is where you machine polish glass using a polish specifically formulated to remove scratches out of glass. The fastest way to remove scratches out of glass via sub-surface glass polishing is to use a rotary polisher, with ha 5" backing plate, a 5" foam interface pad, a rayon glass polishing pad and a polish specifically formulated for removing scratches out of glass.
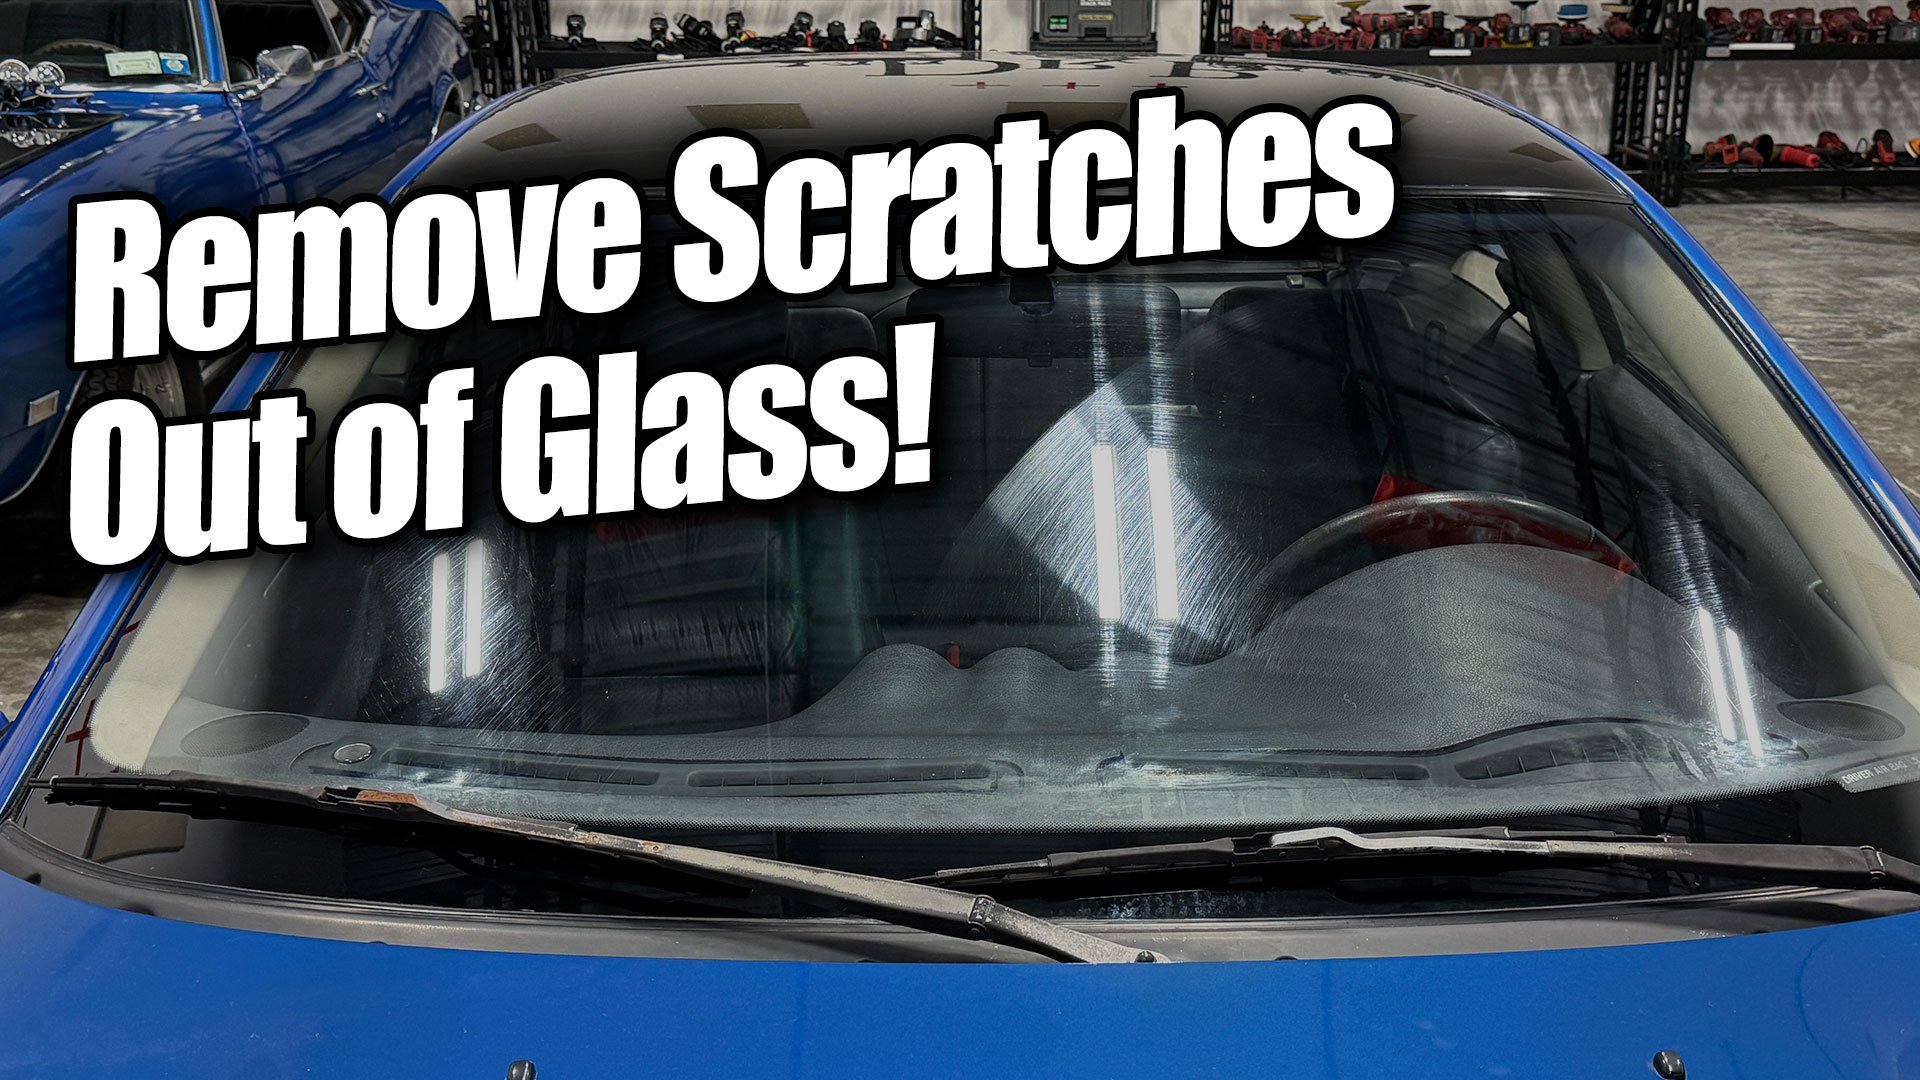
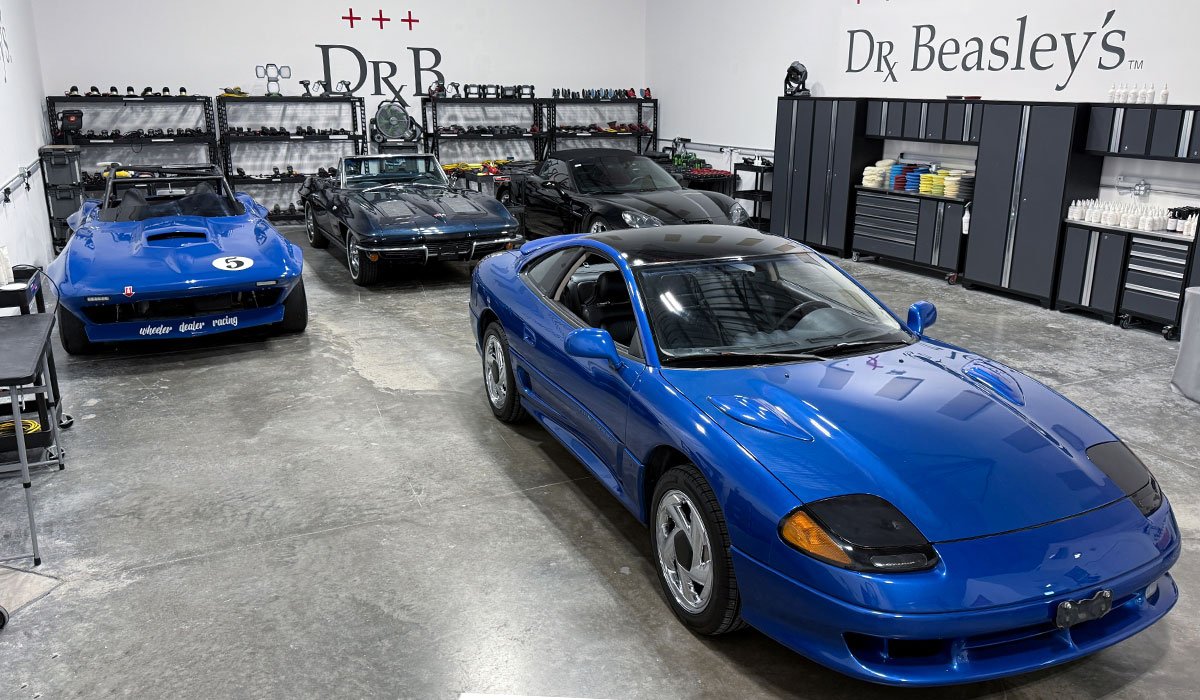
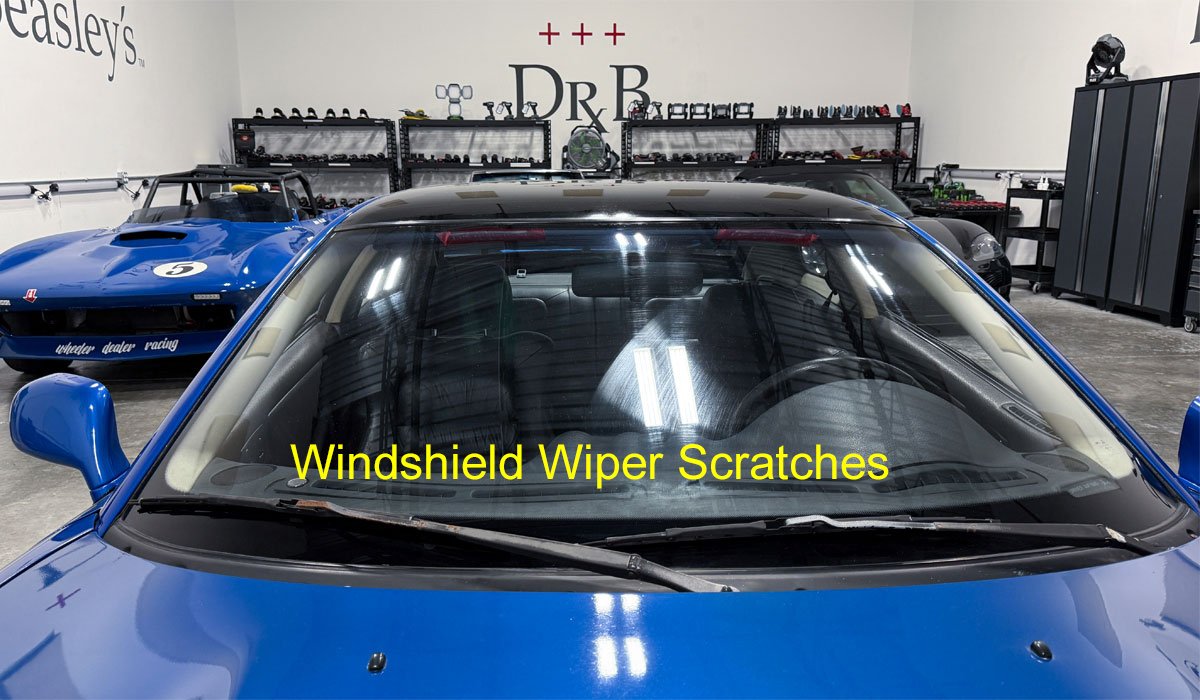
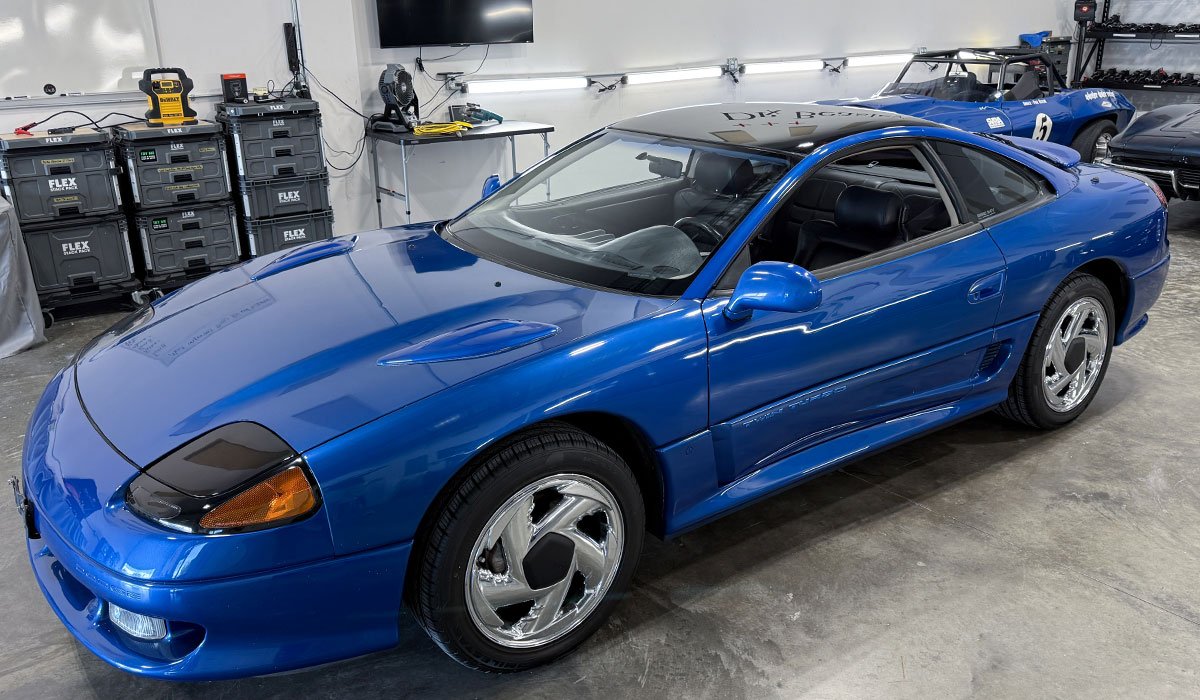
1991 Dodge Stealth Twin Turbo All Wheel Drive
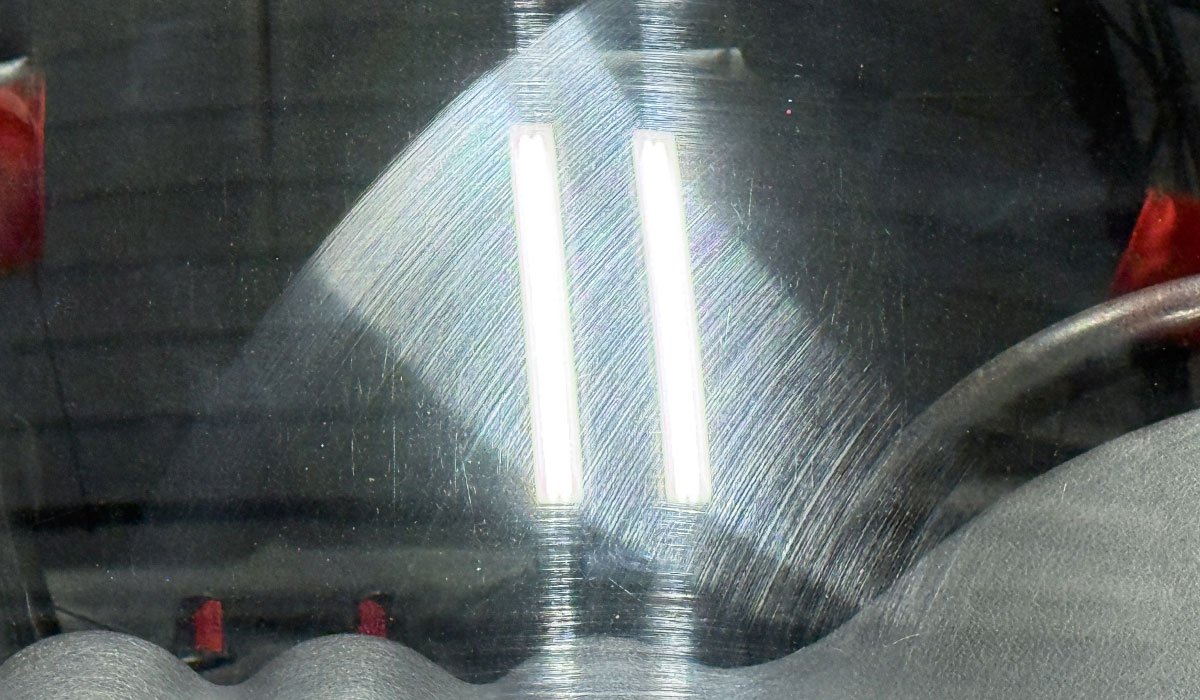
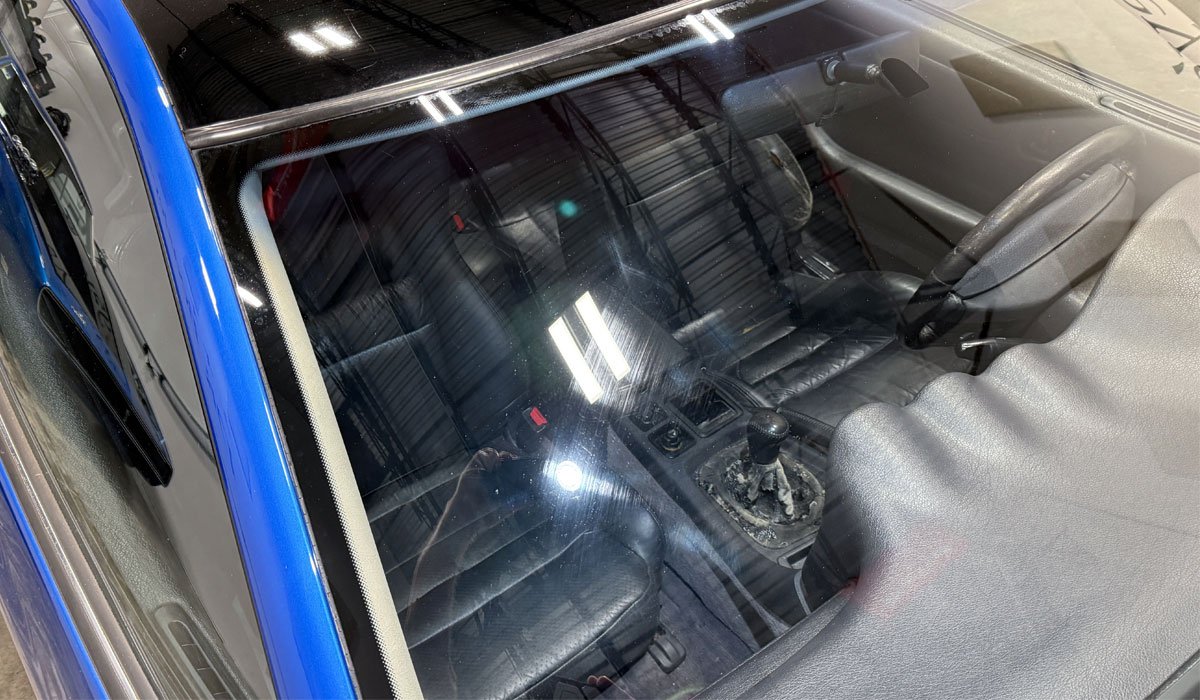
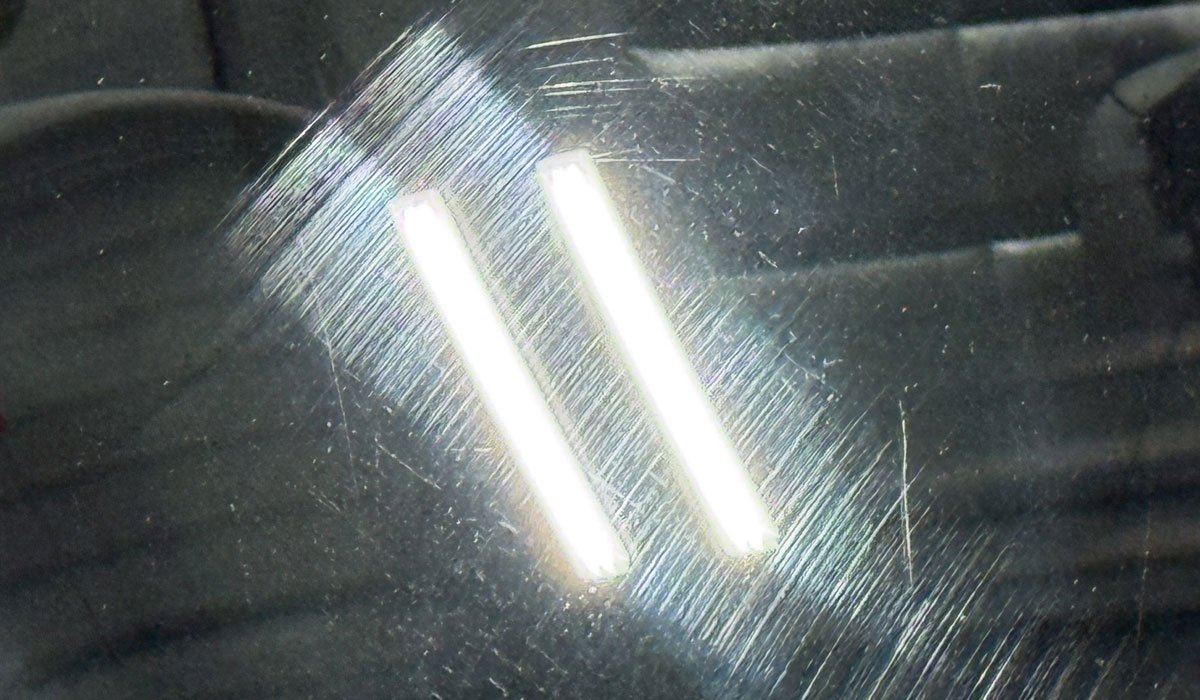
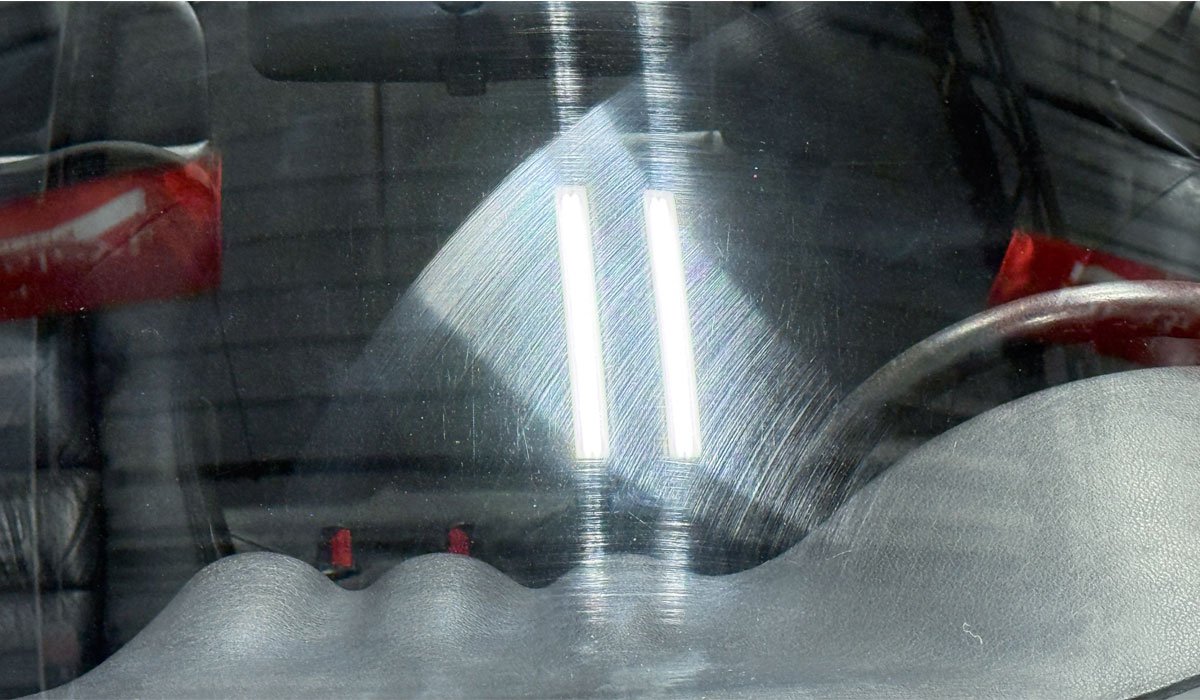
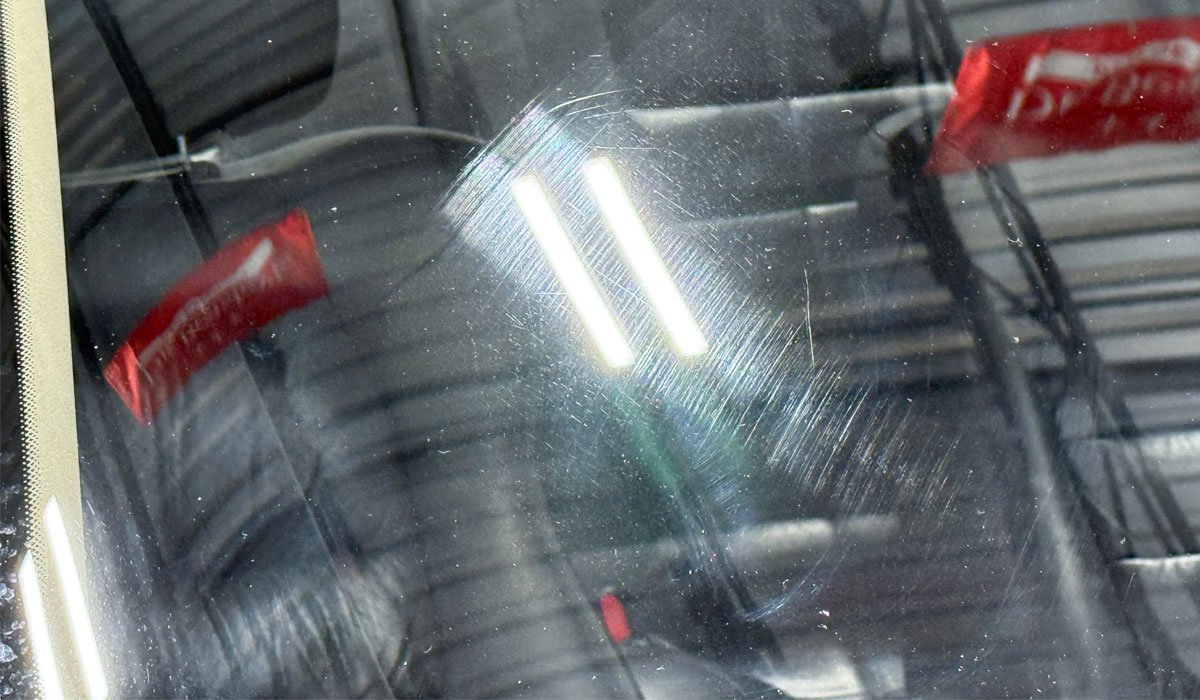
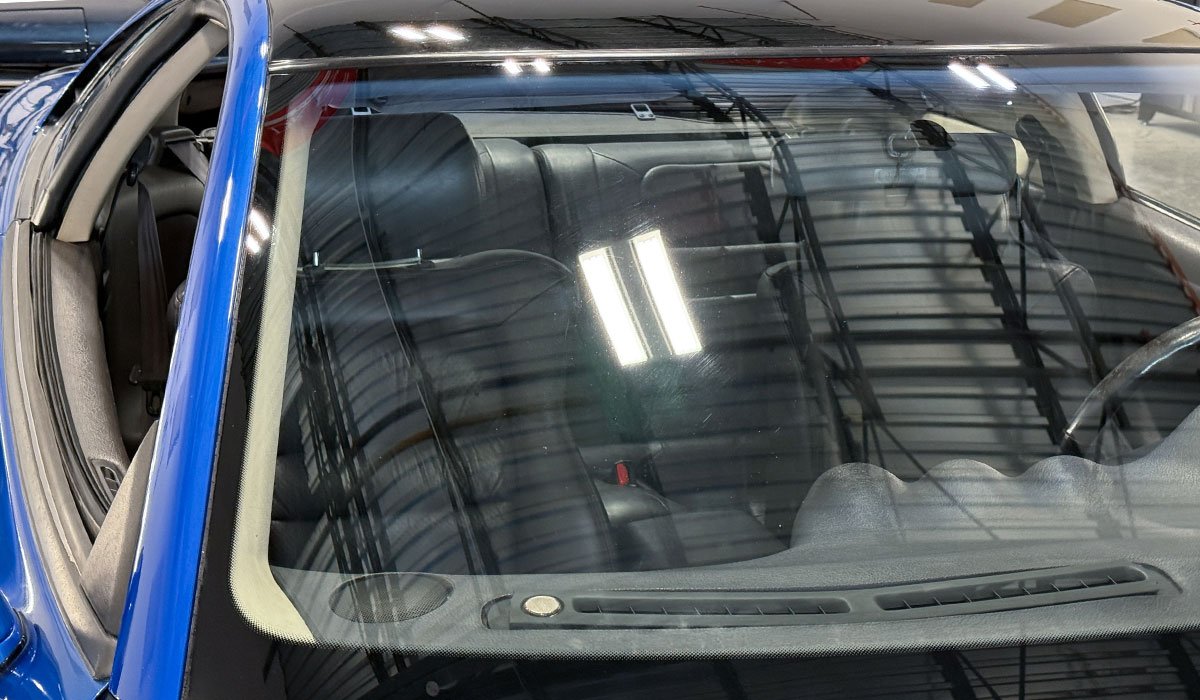
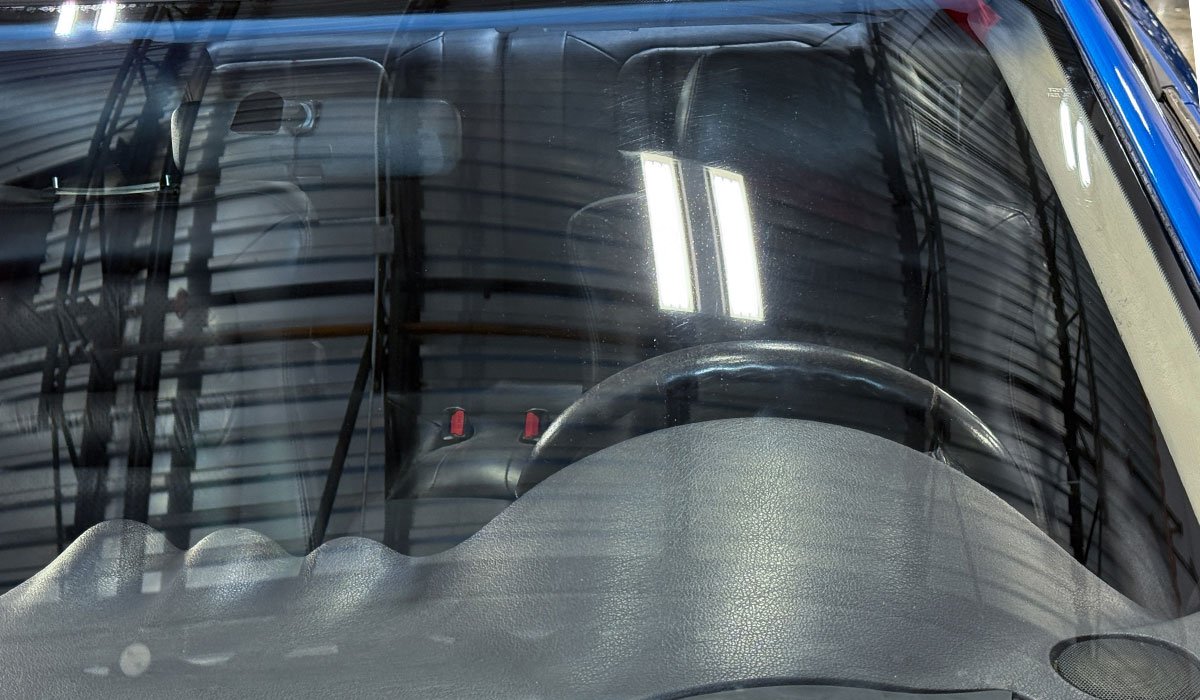
For this project, we'll be removing wiper scratches out of the windshield of a 1991 Dodge Stealth Twin Turbo All Wheel Drive. Back in the 1990s, this was quite the performance car with it's hi-tech engine, suspension and overall design. Like a lot of older cars, over time, wiper scratches, swirls and tiny pits build-up IN the glass. Because these types of defects are
in the glass, i.e.
below the surface, this type of glass polishing is called
sub-surface glass polishing and is different than topical glass polishing.
Glass Polishing Class
For those that are travelling to or are from Florida and are taking any of our Saturday/Sunday classes at the Stuart, Florida facility, if you want, we will have a car all set up for sub-surface glass polishing the day BEFORE the actual class starts. This is a FREE or BONUS class to the actual class. Knowing how to remove scratches out of glass, like common wiper scratches is a great skill to possess, but there's simply not enough time during the actual class to cover this topic.
And the reason there's not enough time during the Saturday/Sunday classes is because we cover more topics, techniques and tools than any other class on planet Earth. Guaranteed. That's why you see three cars behind the Dodge Stealth, they staged for the weekend class. We use real cars, not demo hoods or test panels. In fact, we use real cool cars. So do your research before signing up for some other car detailing classes as most are not as near as hands-on as our classes.
Get more information on our classes
here.
It's Go Time!
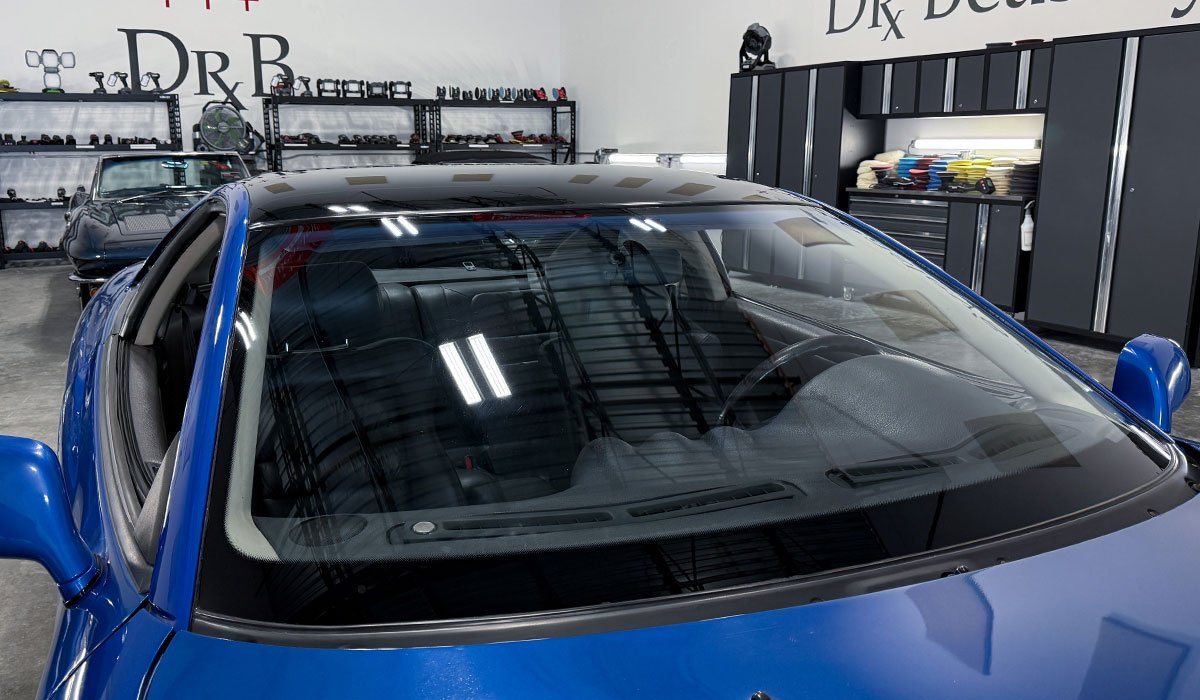
This picture was taken on Friday morning, December 12th 20025 - the day before the actual class. This is a bonus or free class for anyone taking the Saturday class. The three cars on the background are for the Saturday 1-Day Paint Correction and Ceramic Coating Class. This 1991 Dodge Stealth is left over from the
November Class. The owner agreed to leave the car here for glass polishing.
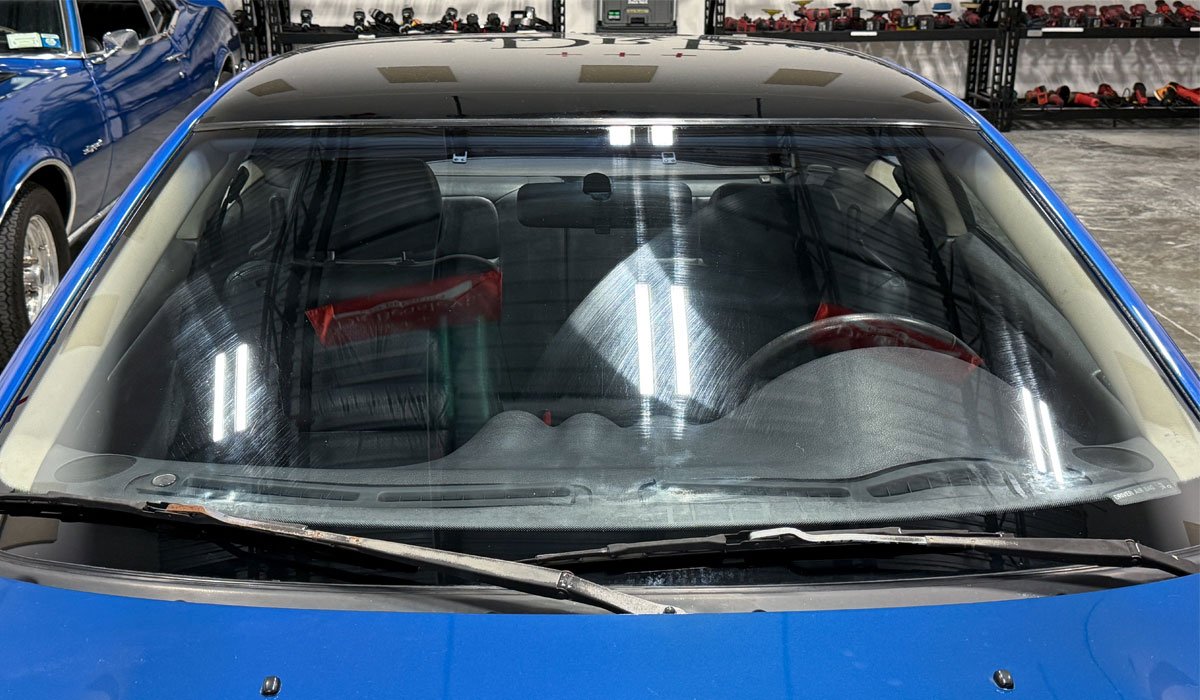
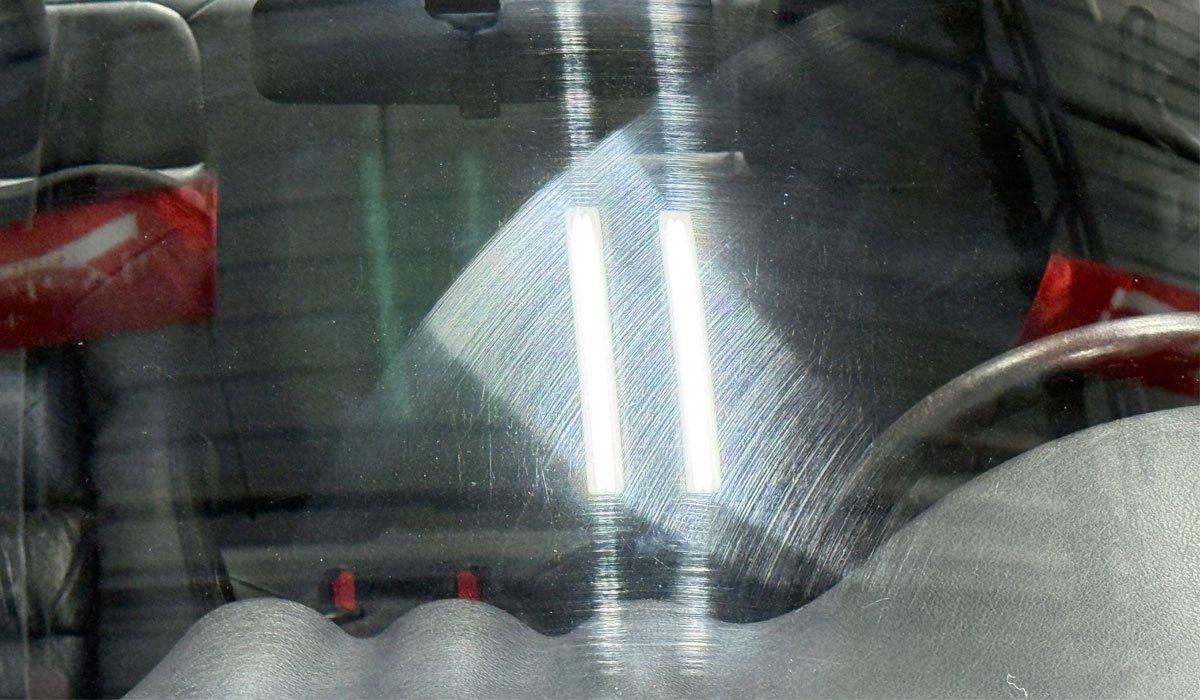
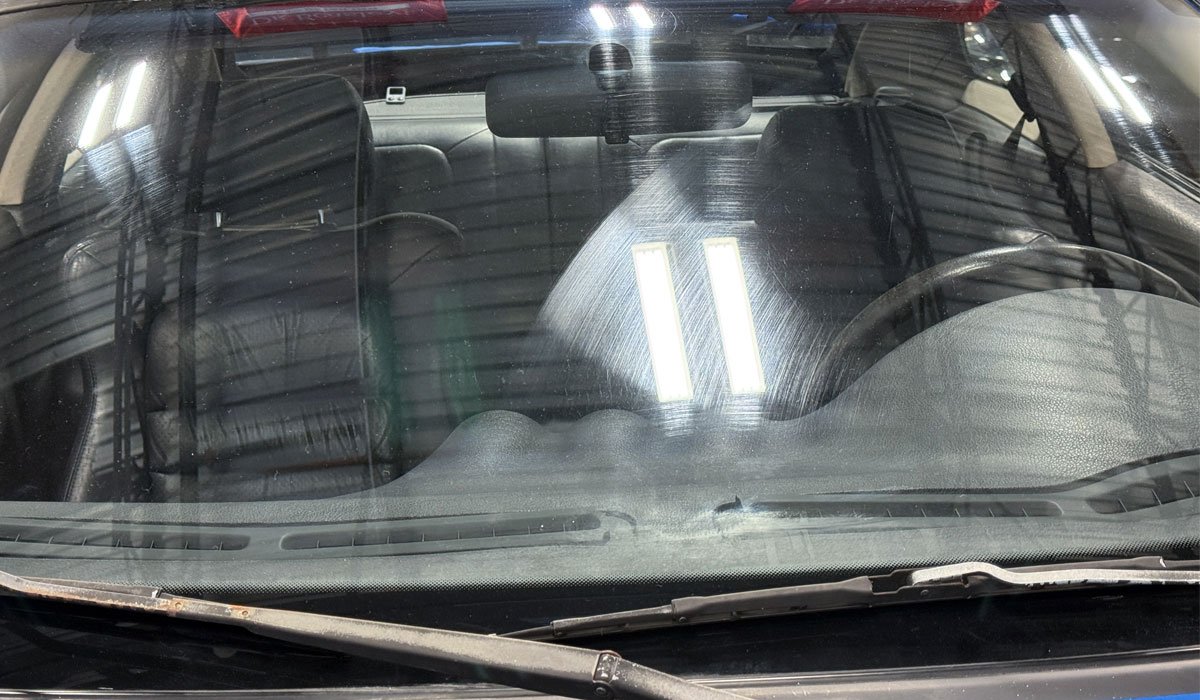
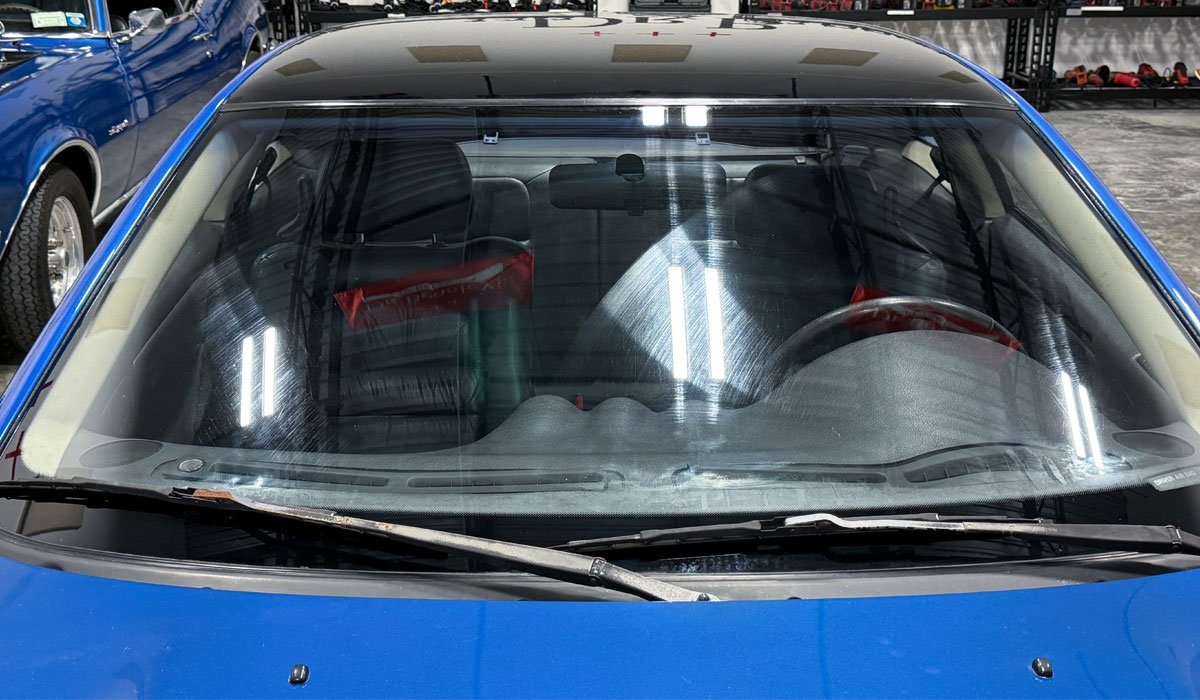
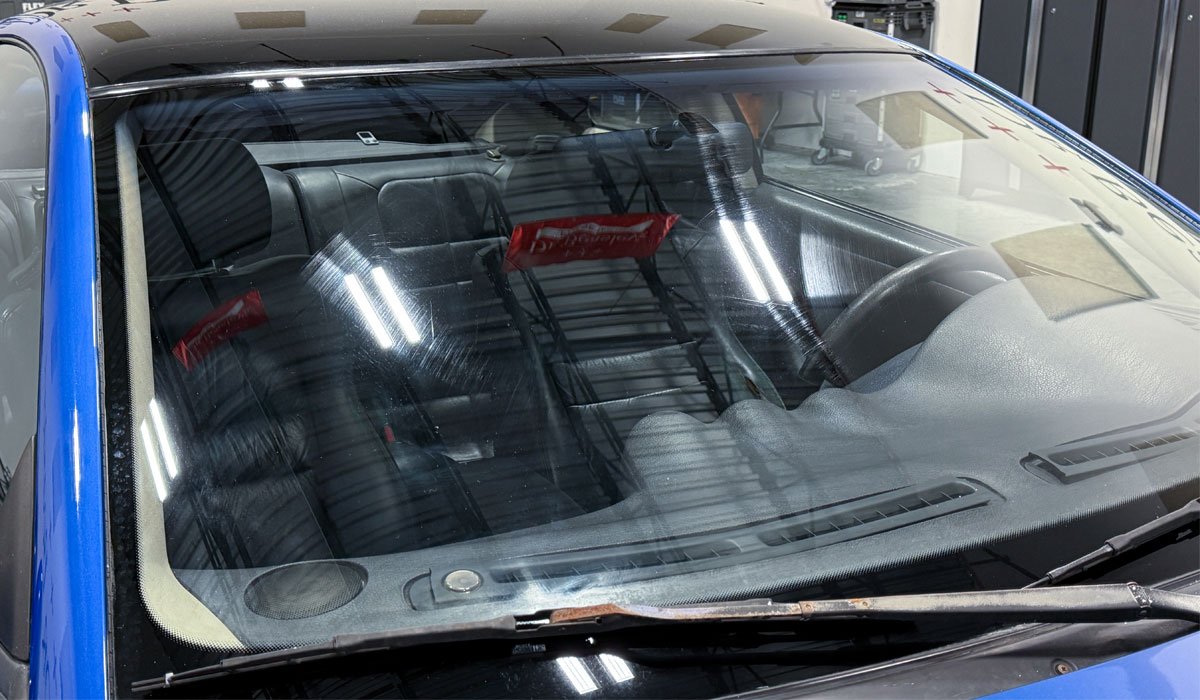
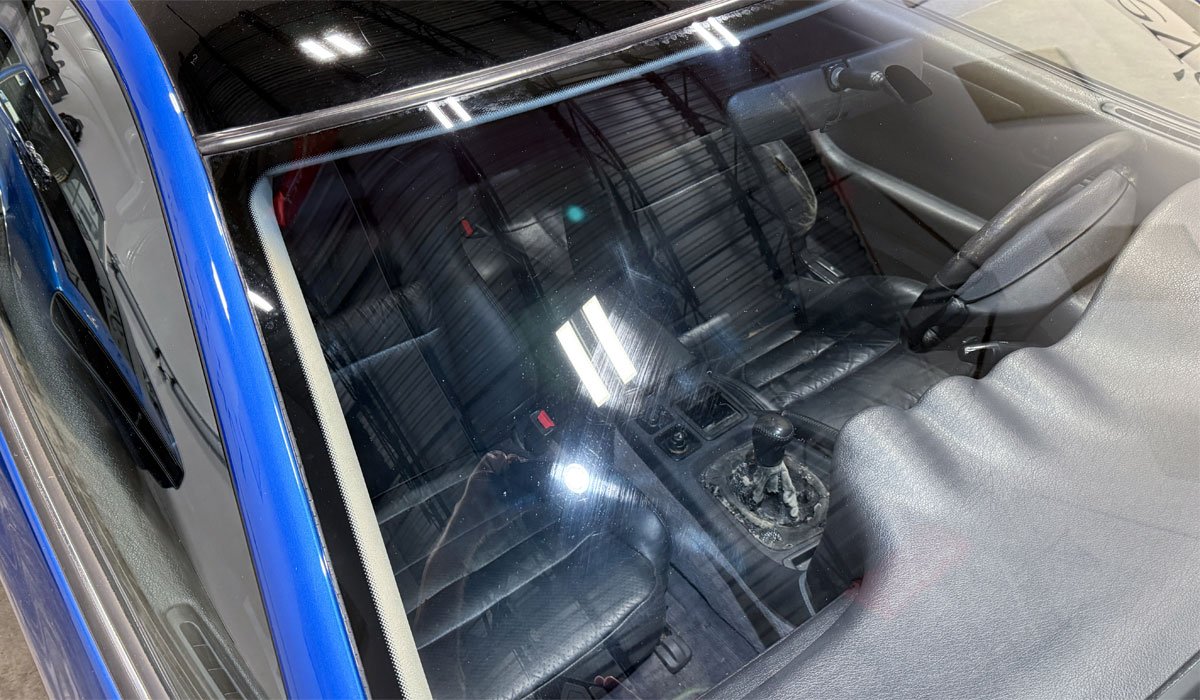
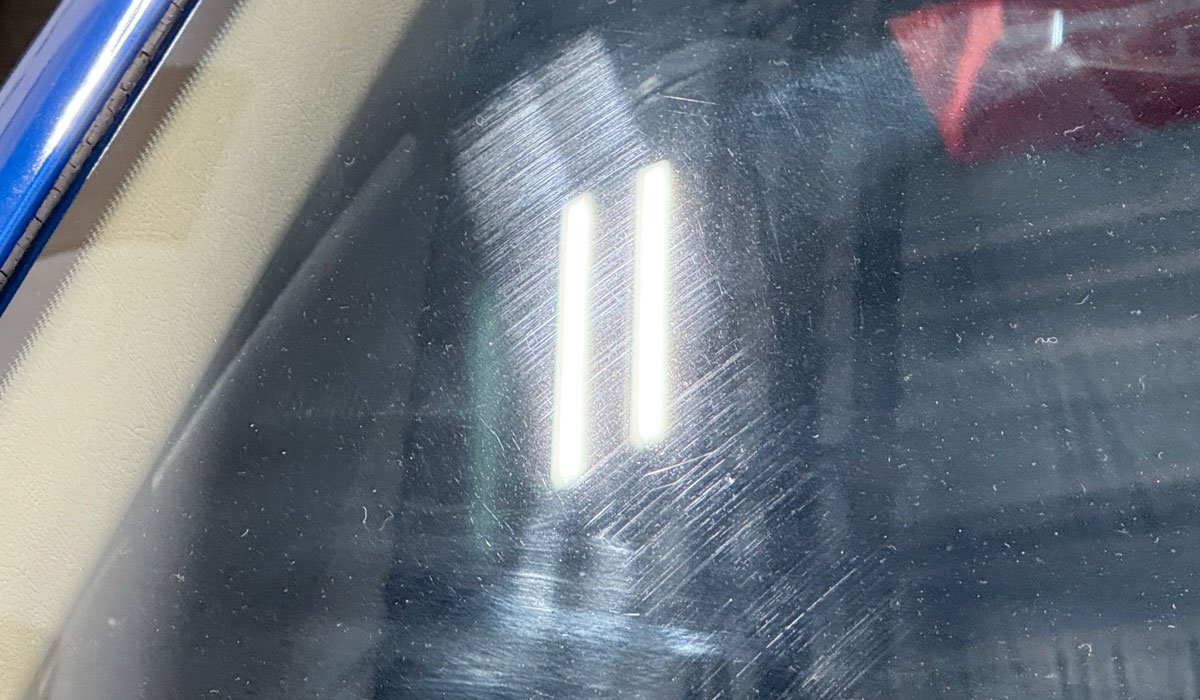
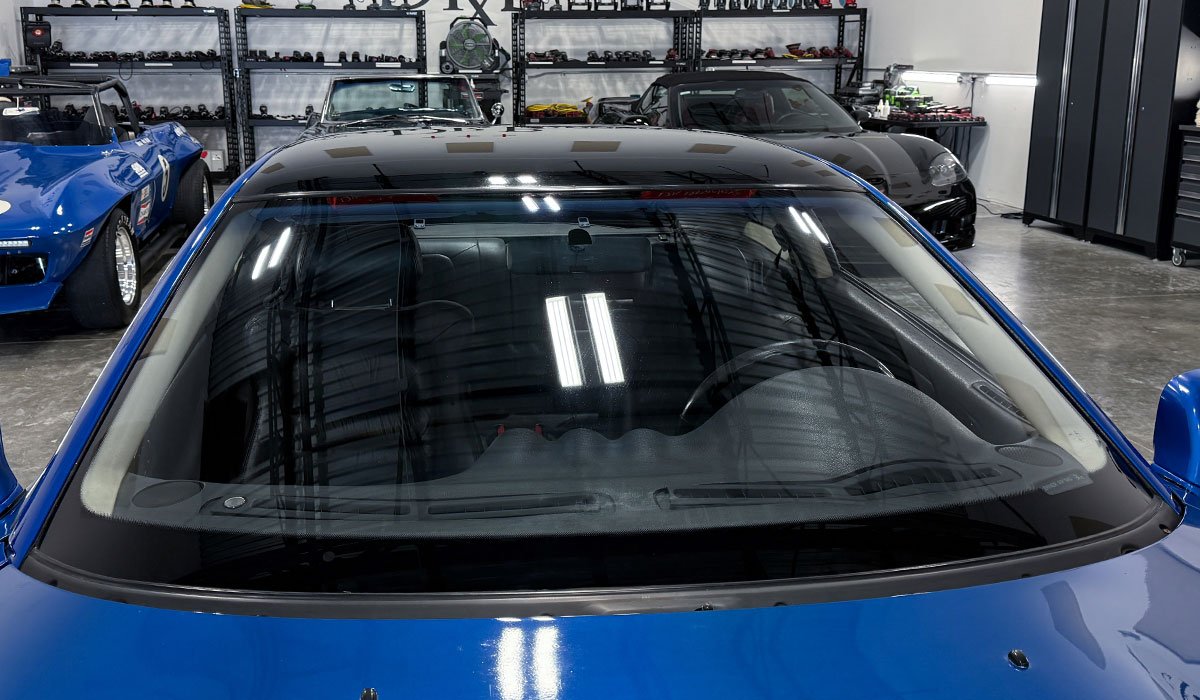
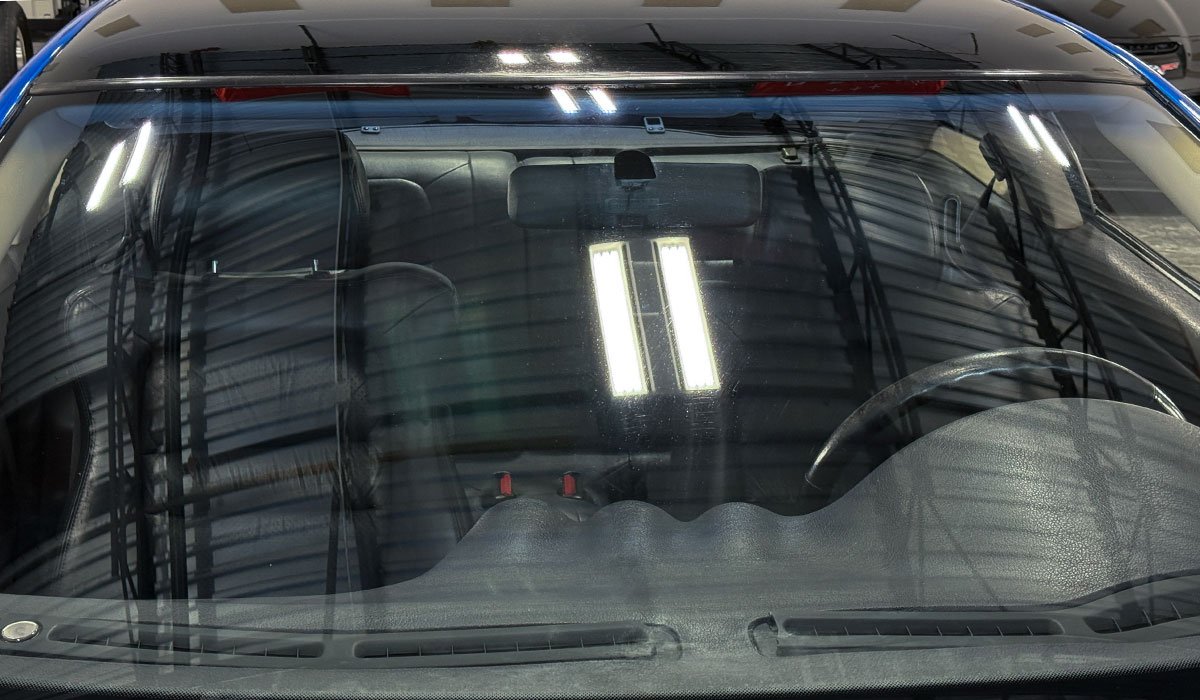
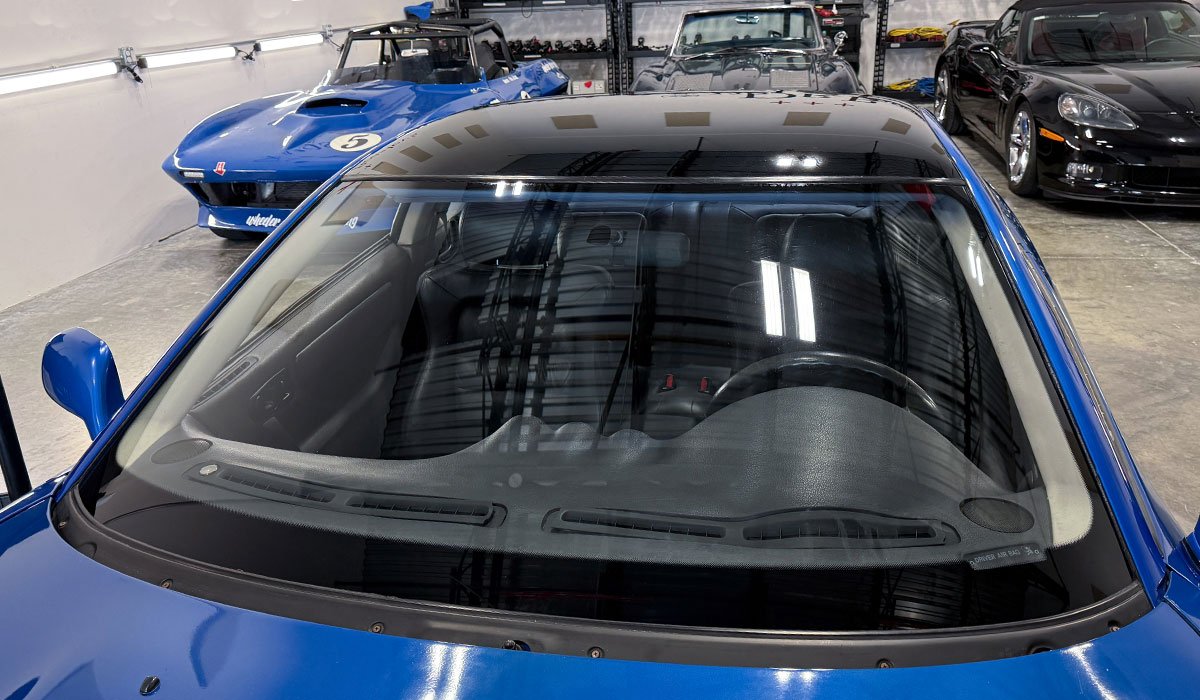
Photography Tips - Take before and after with car in same location
Here's a few more before pictures not only to document the decades of scratches in the glass windshield but also because it's always a good idea to take the before and after pictures with the car in the same location, which means the overhead lights used to capture the before will be the same lights, (with the car in the same location), used to capture the after results.
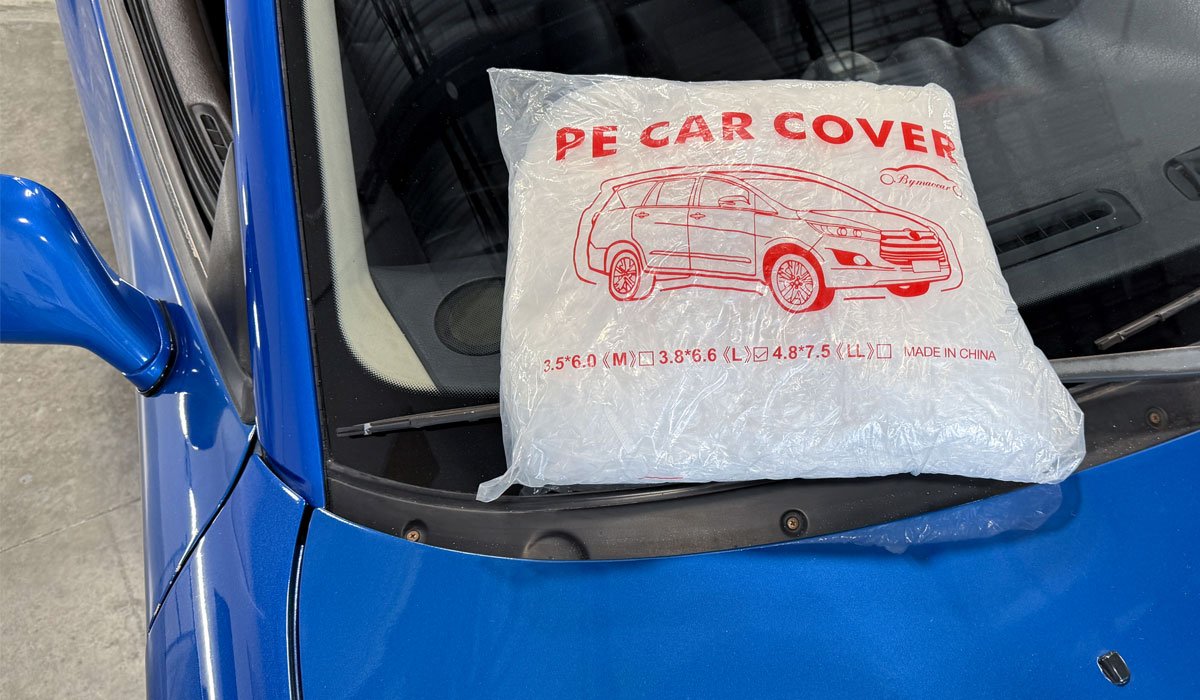
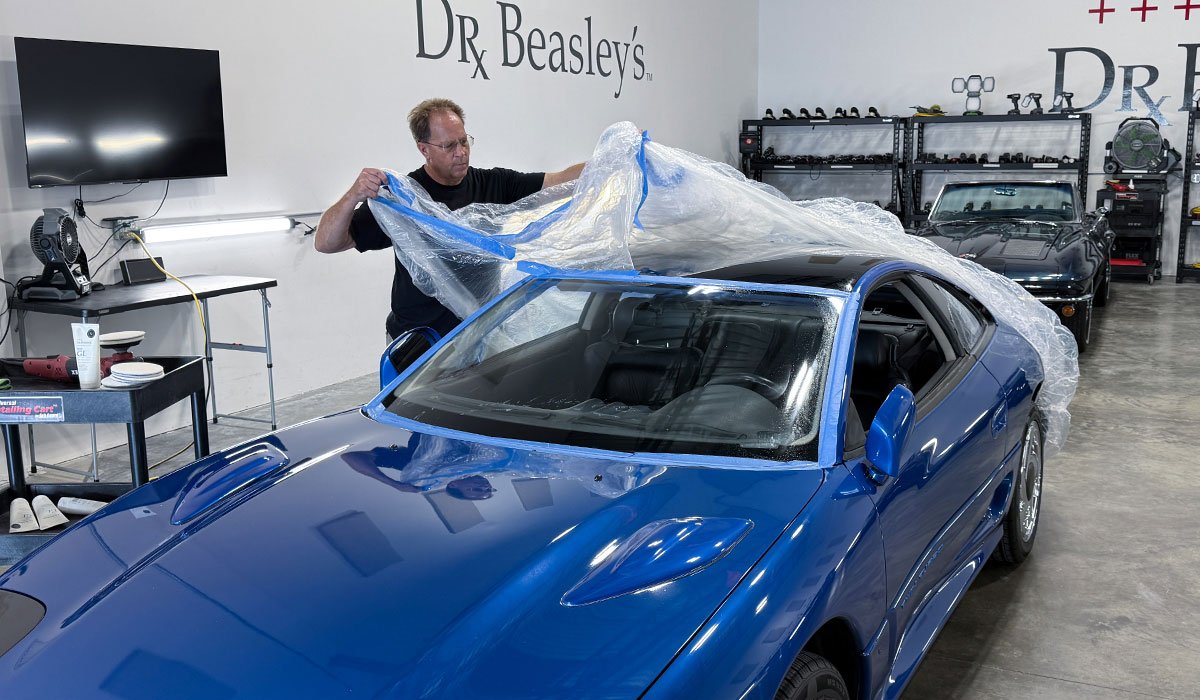
Step 1: Cover car to avoid having to clean the car afterwards
Glass polishing tends to take a few hours and when running a rotary polisher for a few hours, you tend to get product splatter near adjacent body panels. You can as an option NOT cover the car and either wipe the car down or wash it afterwards, but my preference is to cover using a plastic car cover. Also, this car has already been detailed in the November class, so I don't want spatter to get all over the freshly applied ceramic coating whereupon after the glass polishing, you risk marring the coating and also the paint via wiping product spatter off the car.
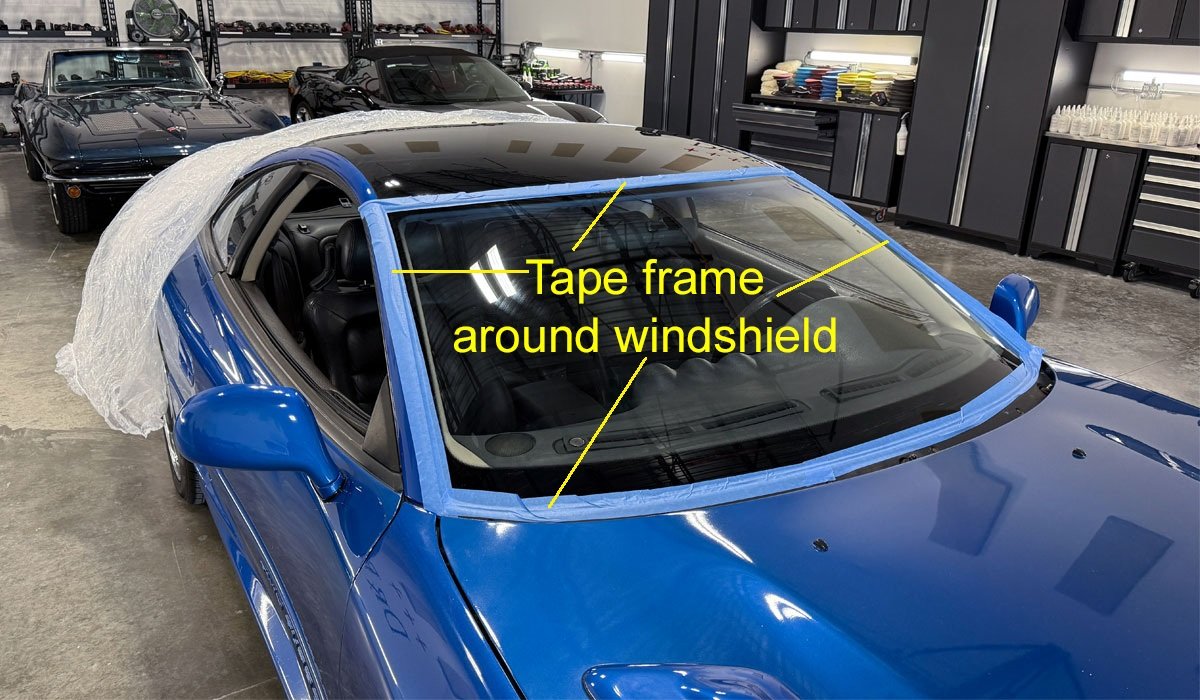
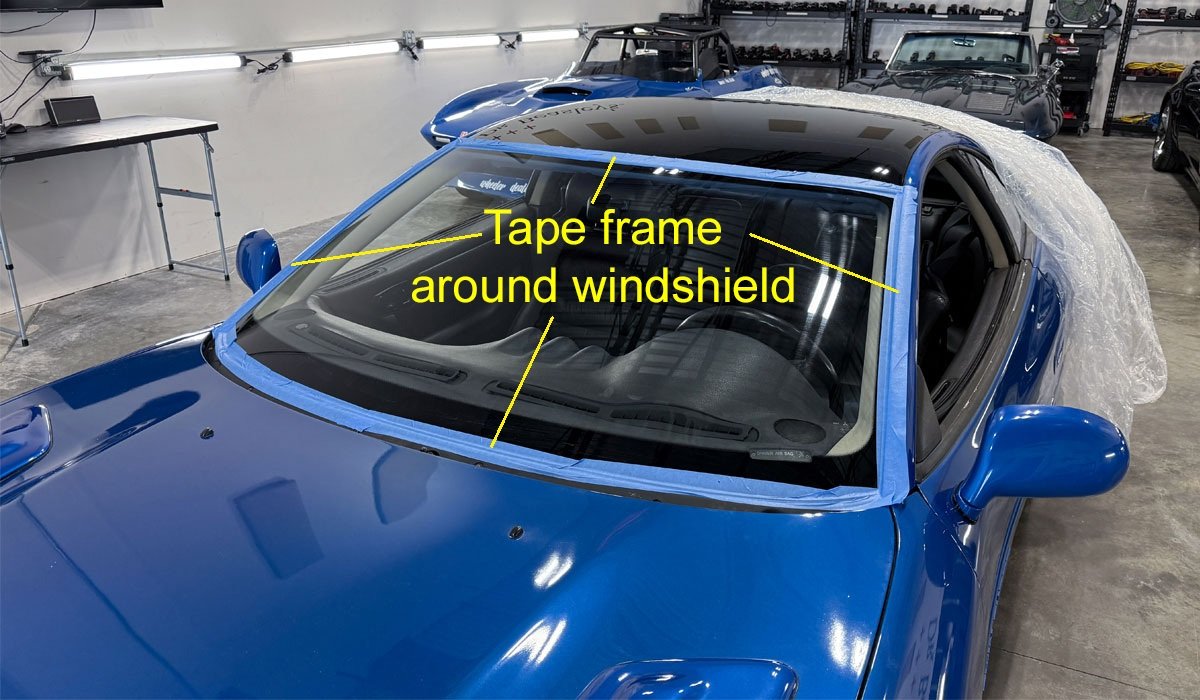
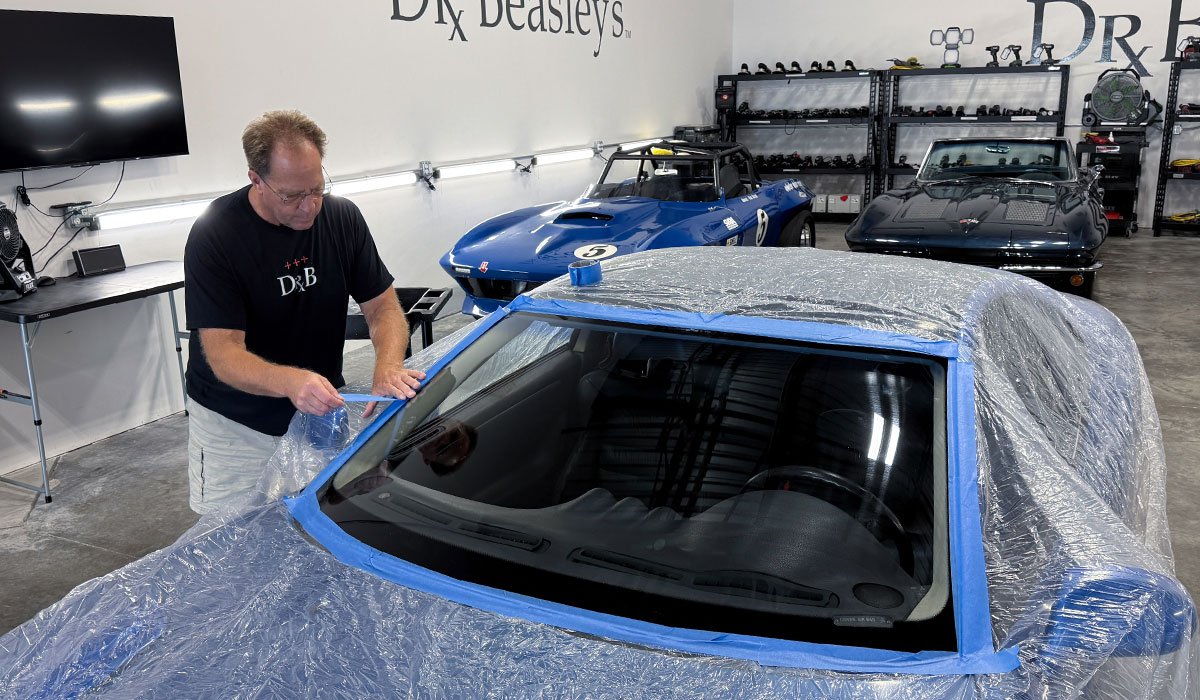
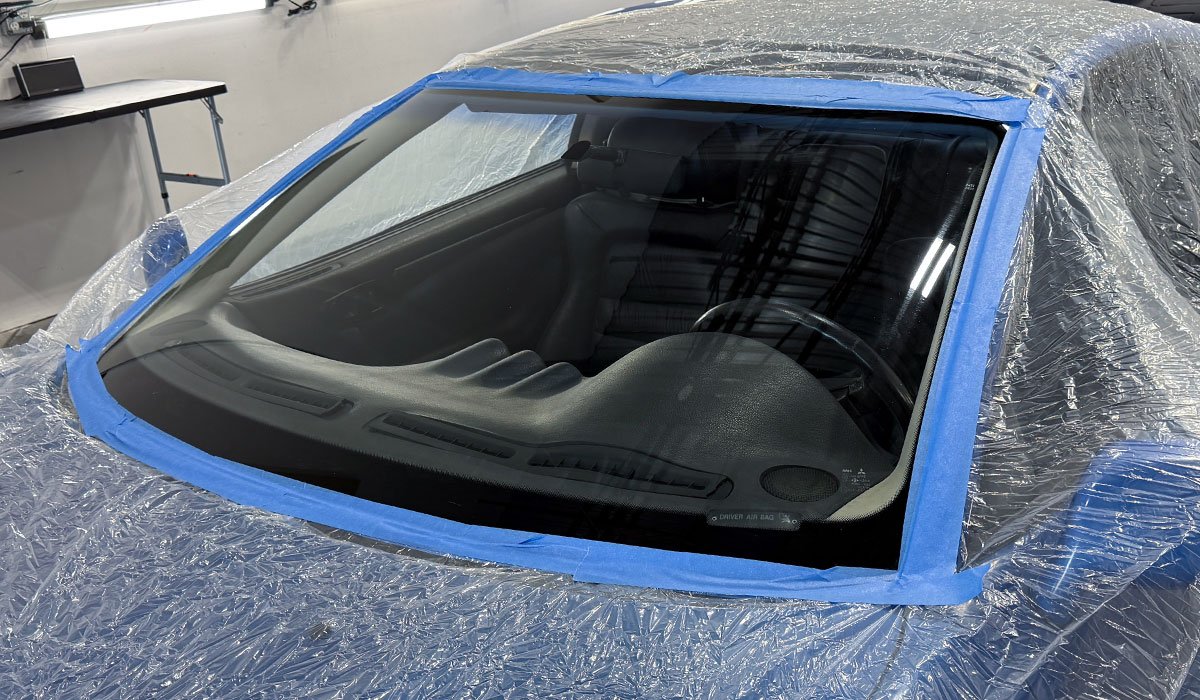
Step 2: Tape Around the Window Frame
Before covering over the windshield with the plastic car cover, start by placing painter's tape all around the windshield frame. The reason I do this is because after you cut the hole out of the plastic to expose the windshield, it is MUCH faster and easier to only have to tape the edges of the plastic to the tape already around the windshield instead of trying to tape the edge of the plastic cover to the outside of the windshield. Take my word for it, this is the correct way to prep a car for glass polishing.
Be sure to firmly attach the tape because if it lifts while you're working, you'll never get it to stick again.
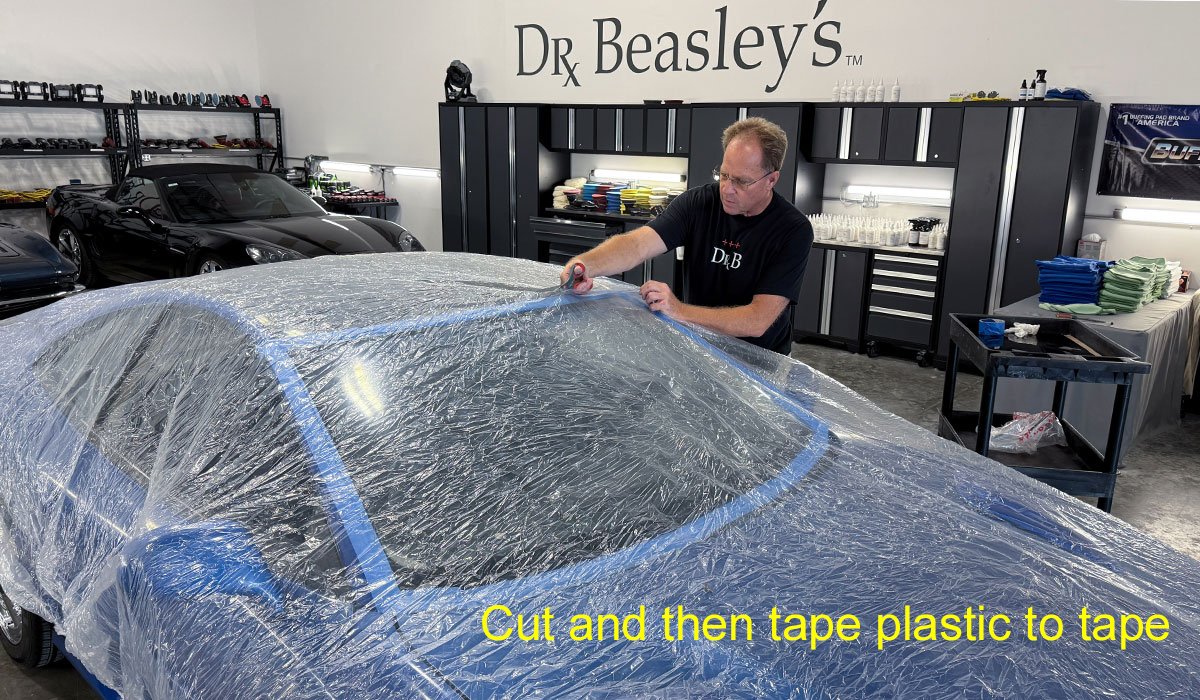
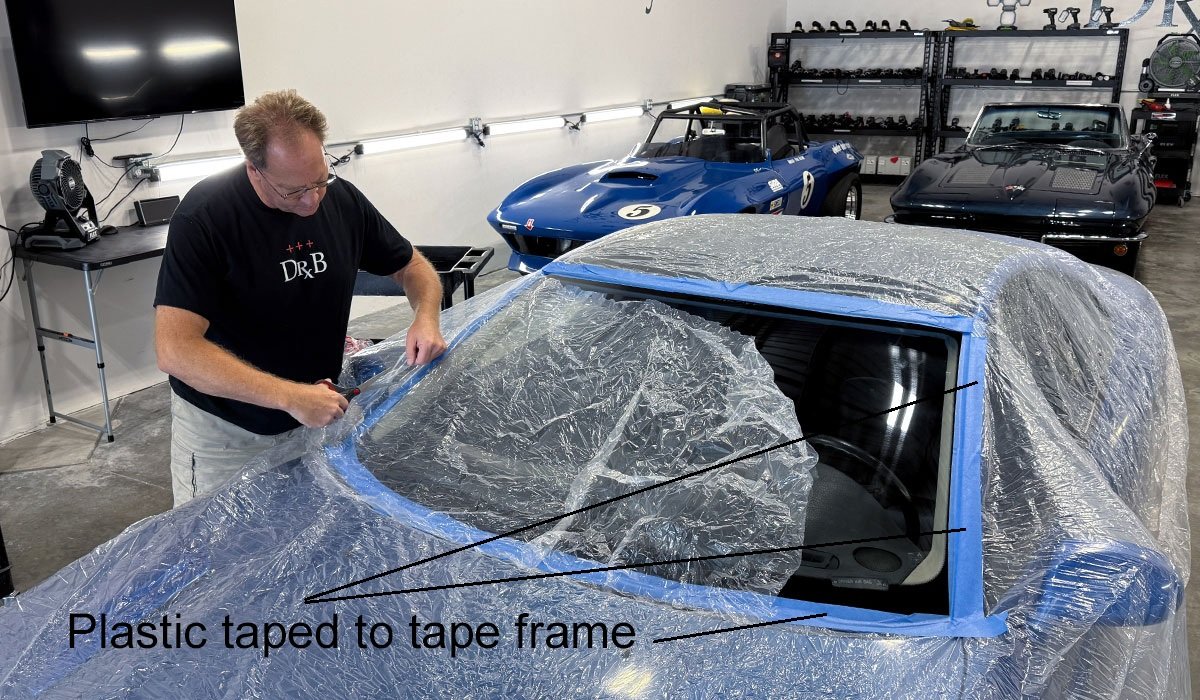
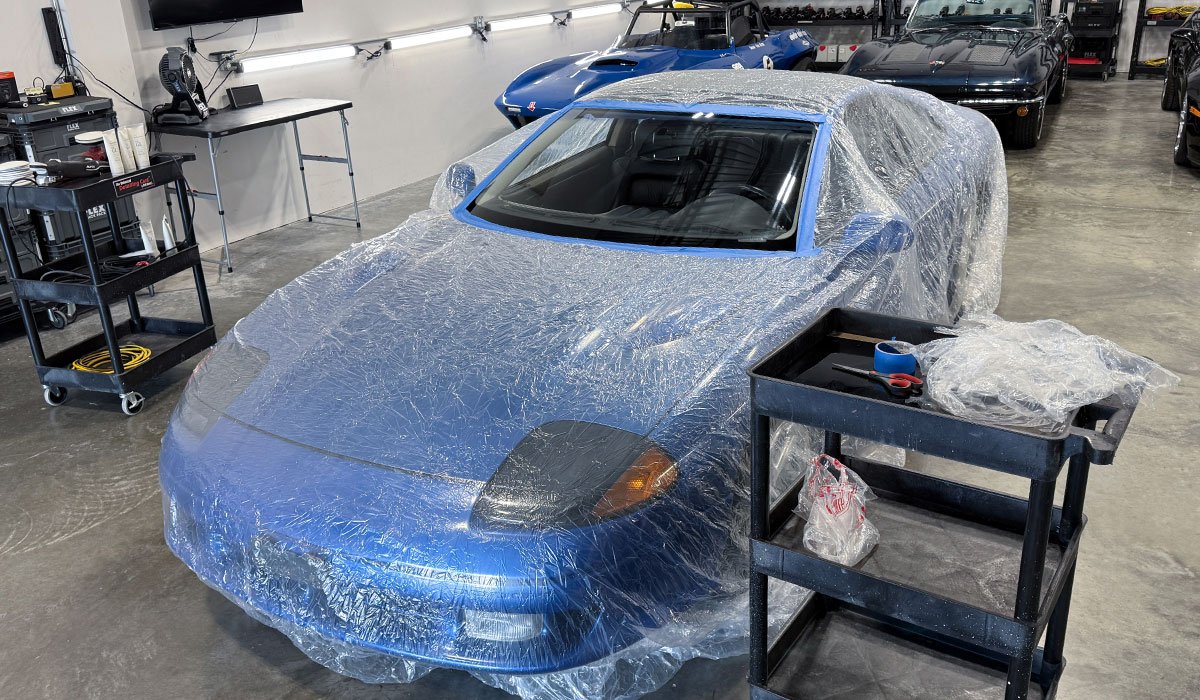
Step 3: Cut a hole out in the plastic tracing around the windshield frame.
Pro Tip: Each time you make cut, either along the tops, bottom or side of the windshield, IMMEDIATELY tape this side of plastic to the tape frame as it makes it easier and cleaner overall.
Move to the other side and continue making a single cut and then tape-to-tape.
Press the tape down firmly to help prevent lifting.
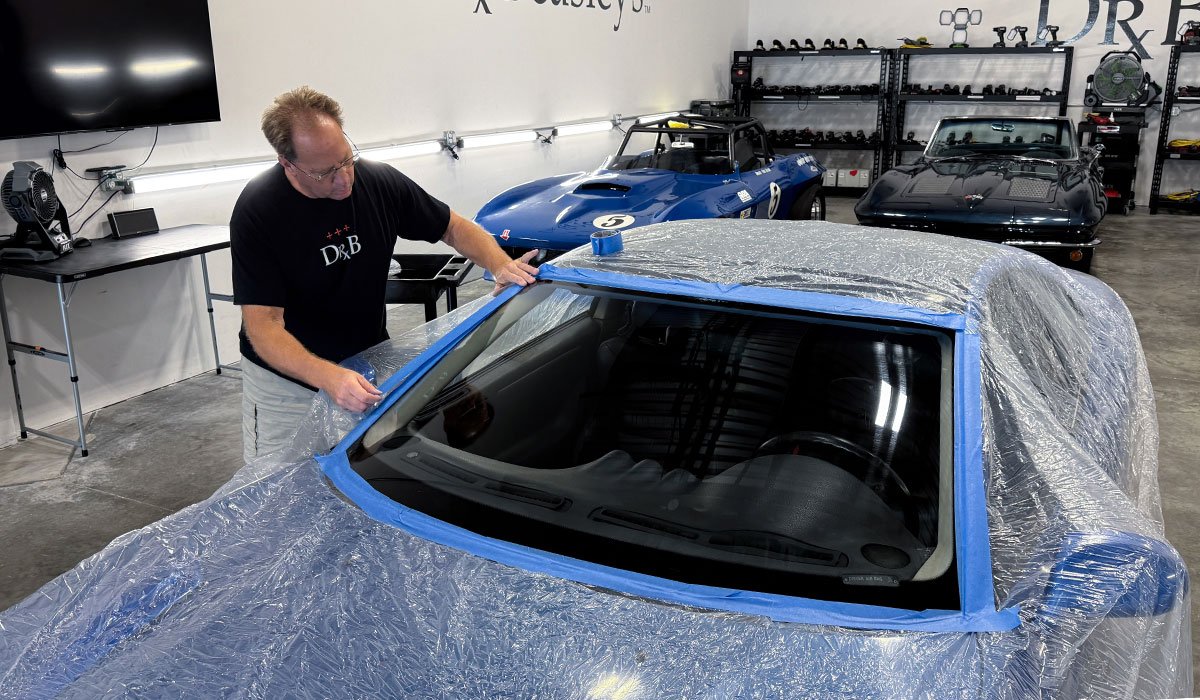
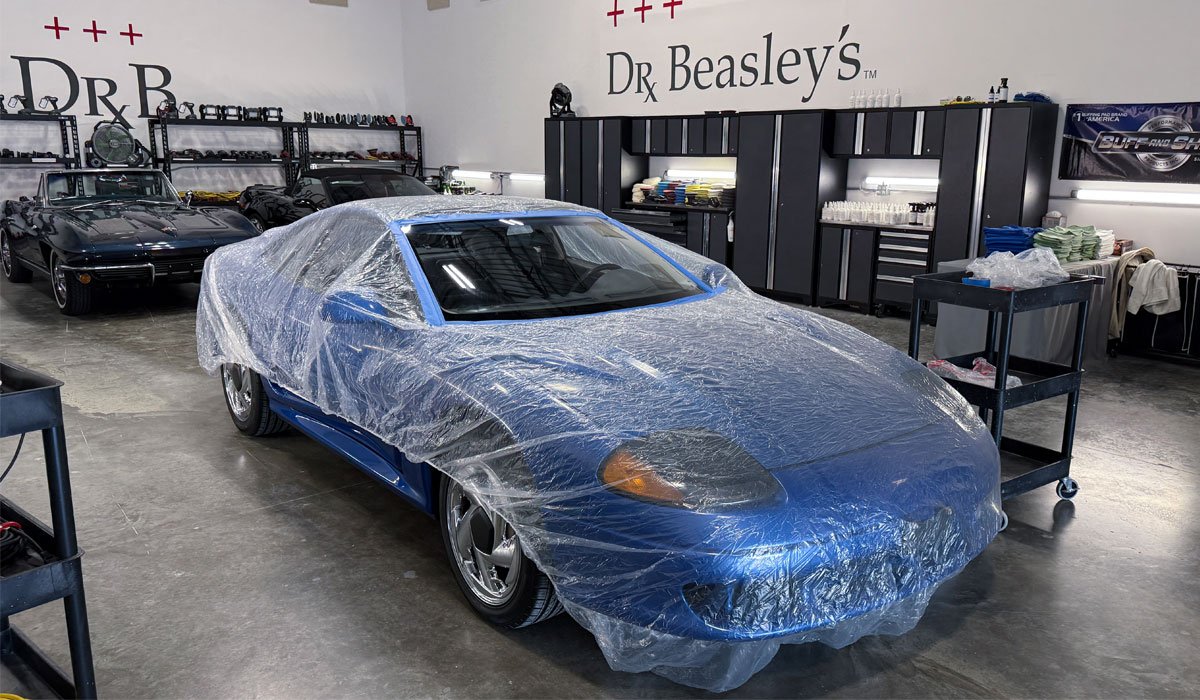
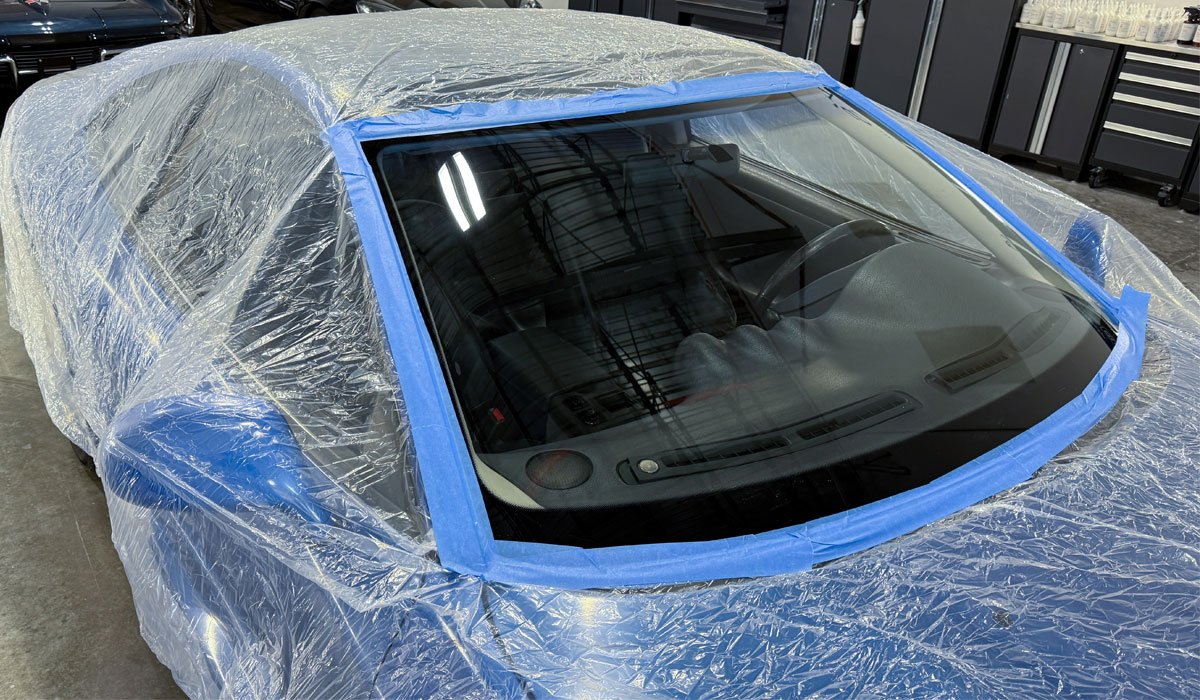
This is how the car should look when you're done.
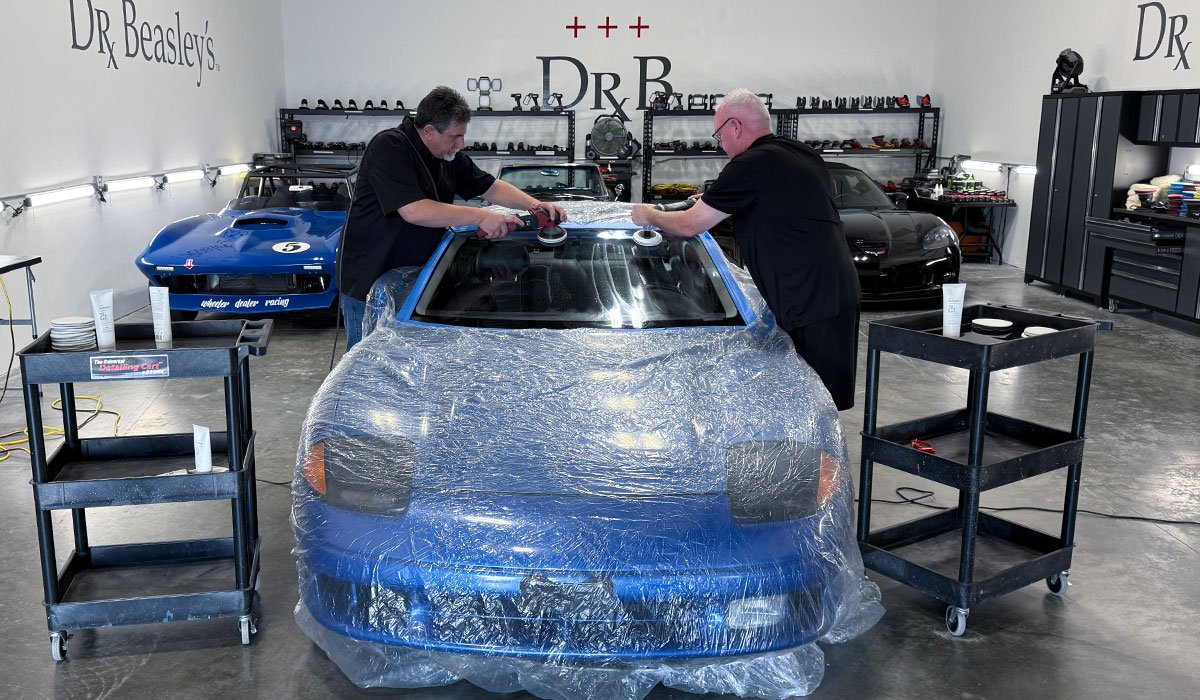
Timie to start polishing!
Here's Tom, all the way from Oregon starting out on the passenger side while Aaron starts on the driver's side.
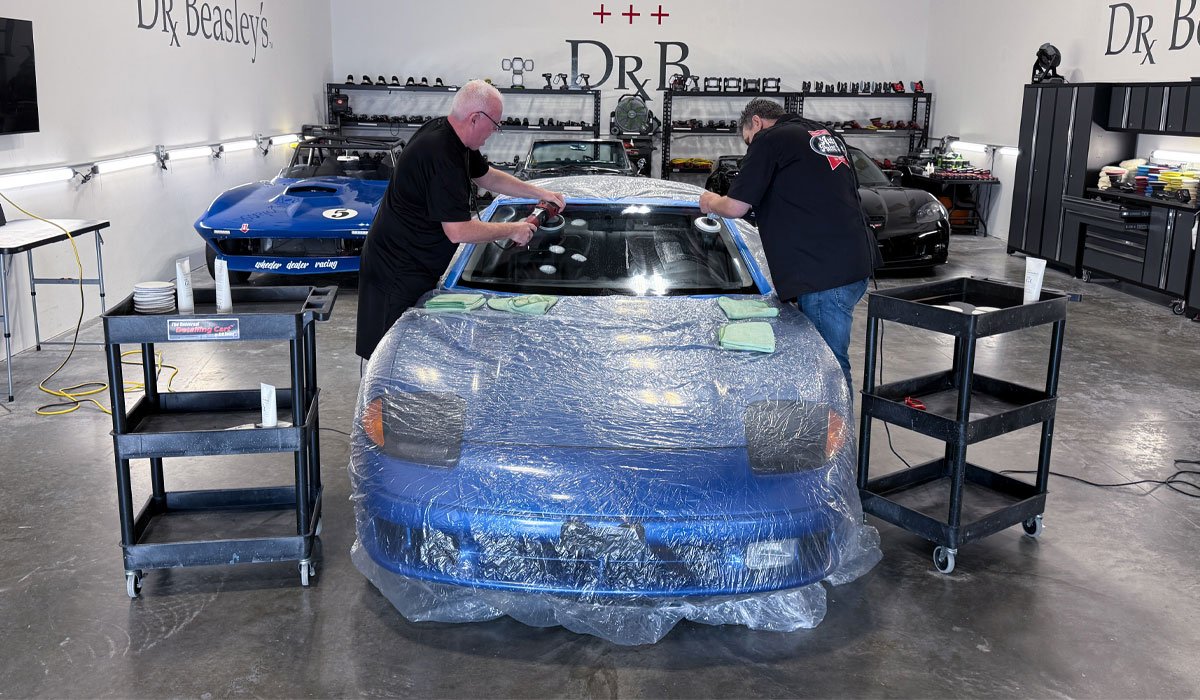
After buffing for a few minutes, it's a good practice to switch sides - this makes it easier on your muscles.
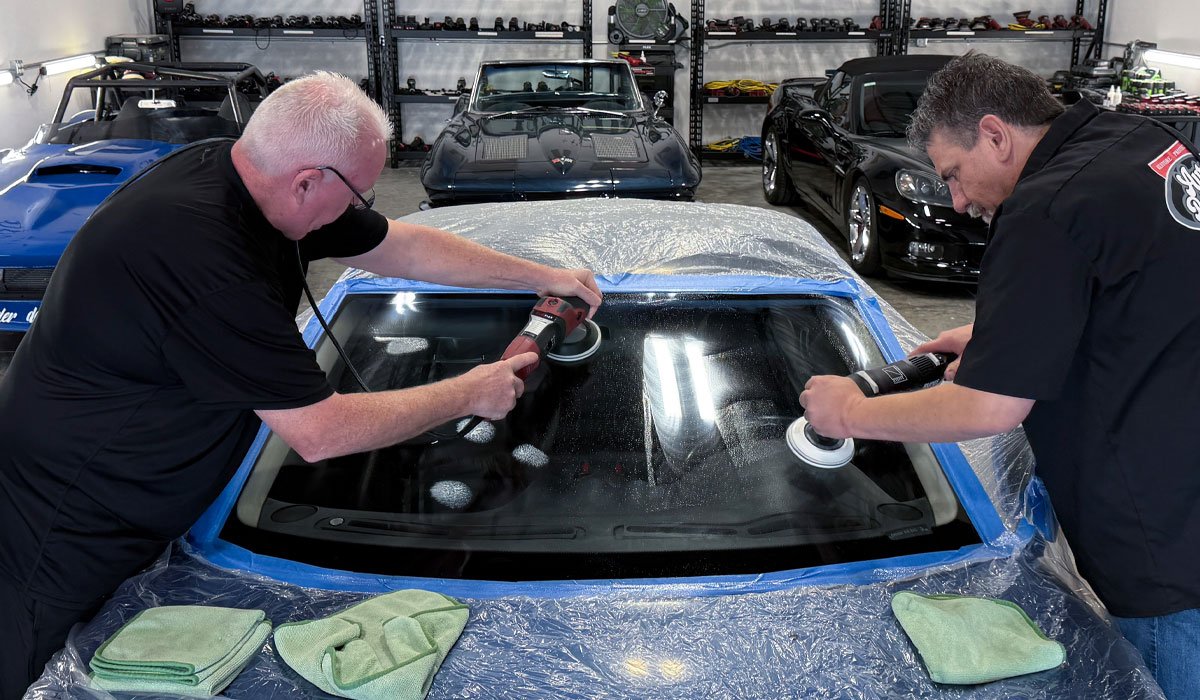
3 Hours later...
When removing the plastic cover, roll it from the outside to the center
")